No problem
I don't use Elements but here are the Photoshop CS6 steps
1) open both images in Photoshop
2) using the magic wand tool, click in the black area of the surface image to mask off the surface

- Screen Shot 2014-11-17 at 3.58.24 PM.png (25.58 KiB) Viewed 20231 times
your resulting mask should look like this:
Then find whatever command that will invert the selected area. In photoshop it is in the Select menu, modify and then invert selection.
It should then look like this:

- Screen Shot 2014-11-17 at 3.58.54 PM.png (277.63 KiB) Viewed 20231 times
3) In this case because of the distorted edge due to some weird processing, I contracted the mask by 2 pixels to give us a clean edge

- Screen Shot 2014-11-17 at 3.59.32 PM.png (26.26 KiB) Viewed 20231 times
4) then feather the edge by 2 or 3 pixels so there will be a gradual transition to the prom image using.

- Screen Shot 2014-11-17 at 3.59.39 PM.png (296.37 KiB) Viewed 20231 times
- Screen Shot 2014-11-17 at 3.59.45 PM.png (273.07 KiB) Viewed 20231 times
5) choose "copy"

- Screen Shot 2014-11-17 at 3.59.54 PM.png (40.43 KiB) Viewed 20230 times
6) go to the other file and choose "paste"

- Screen Shot 2014-11-17 at 4.00.39 PM.png (69.97 KiB) Viewed 20231 times
7) select the pasted image and more it over to the edge of the prom inmate being careful to cover the edge al;l the way. It won't be large enough to cover the whole thing so just start on one edge.

- Screen Shot 2014-11-17 at 4.00.52 PM.png (12.38 KiB) Viewed 20231 times

- Screen Shot 2014-11-17 at 4.01.16 PM.png (457.42 KiB) Viewed 20231 times
8) then grab the corner boxes and resize it to cover the edge all around.

- Screen Shot 2014-11-17 at 4.01.26 PM.png (463.43 KiB) Viewed 20231 times
9) then using the box mask tool, crop the image to make it look nice and centered and save it as a .jpg or whatever file format you like...

- Screen Shot 2014-11-17 at 4.01.33 PM.png (29.3 KiB) Viewed 20231 times

- Screen Shot 2014-11-17 at 4.01.44 PM.png (462.14 KiB) Viewed 20231 times

- Screen Shot 2014-11-17 at 4.02.04 PM.png (80.96 KiB) Viewed 20231 times
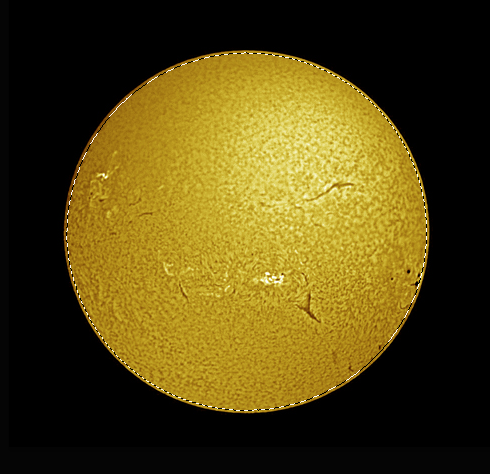
Here is the finished job....

- combined image.jpg (197.68 KiB) Viewed 20231 times