SHG images Ha and Ca

I LOVE finding out about different ways to appreciate the Sun and light in general. Use this forum to post your info or questions about various outside the mainstream ways to appreciate our life giving star!
Post Reply
User avatar
rsfoto
Way More Fun to Share It!!
Posts: 6289
Joined: Mon Jun 18, 2012 8:30 pm
Location: San Luis Potosi, México
Has thanked: 9677 times
Been thanked: 5750 times

SHG images Ha and Ca

Post by rsfoto »

Hi,

Now after having the Sol'Ex fully motorized it is easier to tinker with the element lines and focus camera and telescope.

I guess I am slowly getting there. In order to see what is wrong with my SHG images I think I need to shoot H-alpha with my reliable setup and compare.

Judgiung the images below there is still a steep climb ahead of me.

Below a H-alpha image as well as my first Ca image, both untreated as they came out of the INTI software.

Thanks for looking.


Image


Image


regards Rainer

Observatorio Real de 14
San Luis Potosi Mexico

North 22° West 101°
thesmiths
Almost There...
Almost There...
Posts: 1066
Joined: Mon Jun 04, 2012 8:13 pm
Location: London, England
Has thanked: 47 times
Been thanked: 1521 times

Re: SHG images Ha and Ca

Post by thesmiths »

You are very close. Something needs a bit better focus. The hardest is actually the telescope. The best way is to adjust the telescope focus while scanning very slowly. You want the wiggles in the spectral line (which contains the data) to be maximum.

The next hardest thing to focus is the collimator. But with the Solex, you can't really do this when it's on the telescope. Basically, you want the image of the slit to be sharp when viewed with a camera and lens which is focused at infinity. Ideally, use a red filter for H-alpha.


User avatar
marktownley
Librarian
Librarian
Posts: 42494
Joined: Tue Oct 18, 2011 5:27 pm
Location: Brierley Hills, UK
Has thanked: 20732 times
Been thanked: 10427 times
Contact:

Re: SHG images Ha and Ca

Post by marktownley »

Looks like you're making progress there Rainer!


Image
http://brierleyhillsolar.blogspot.co.uk/
Solar images, a collection of all the most up to date live solar data on the web, imaging & processing tutorials - please take a look!
User avatar
rsfoto
Way More Fun to Share It!!
Posts: 6289
Joined: Mon Jun 18, 2012 8:30 pm
Location: San Luis Potosi, México
Has thanked: 9677 times
Been thanked: 5750 times

Re: SHG images Ha and Ca

Post by rsfoto »

thesmiths wrote: Sun Feb 12, 2023 2:30 am You are very close. Something needs a bit better focus. The hardest is actually the telescope. The best way is to adjust the telescope focus while scanning very slowly. You want the wiggles in the spectral line (which contains the data) to be maximum.

The next hardest thing to focus is the collimator. But with the Solex, you can't really do this when it's on the telescope. Basically, you want the image of the slit to be sharp when viewed with a camera and lens which is focused at infinity. Ideally, use a red filter for H-alpha.
Hi Doug,

Thanks. I watched many times the video from Christian Buil in regard to focusing the collimator lens to the camera.
The next hardest thing to focus is the collimator. But with the Solex, you can't really do this when it's on the telescope. Basically, you want the image of the slit to be sharp when viewed with a camera and lens which is focused at infinity. Ideally, use a red filter for H-alpha.
In his video Christian Buil does focus the camera with the collimator lens pointing on some trees looking out of his window and here now arises my question. How far were those trees in order to accept if they are really at an infinity position. What is the distance in order to say that a 80mm lens is at infinity.

The only thing I have here for focusing far away is a chimney located approximately 1.5 km from my Observatory window. Is this infinity for a 80mm lens or what would it be ? I used as recommended a IV/IR filter for the adjustment as recommended in the video ... I can say I followed all steps as recommended in the video ... So, what is missing then ? The next step I can do is to focus on Polaris and taking into consideration that a 80mm lens gives a very wide field of view this makes it easier but then I have focused at real infinity and the Sun is only 150 million kms away :lol:

If I have clear sky tonight I will take down camera with collimator lens and see if it is in focus. Need to rpint some supports to be safe and noting fall on the floor.

OK, hat and coat into the Observatory now for designing and printing a support for the collimator lens and a tripod head as well as a 1.25" filter holder for the front of the collimator tube with lens.

Have a nice Sunday

:bow2


regards Rainer

Observatorio Real de 14
San Luis Potosi Mexico

North 22° West 101°
thesmiths
Almost There...
Almost There...
Posts: 1066
Joined: Mon Jun 04, 2012 8:13 pm
Location: London, England
Has thanked: 47 times
Been thanked: 1521 times

Re: SHG images Ha and Ca

Post by thesmiths »

I think you misunderstood how to focus the collimator. It is not the collimator that needs to be focused at infinity, it is the lens on the camera. I actually tend to focus on clouds (which are easily visible with a red filter). You then point the camera lens at the collimator lens and adjust the collimator until the image of the slit is in good focus. It doesn't matter really what the collimator is pointed at, just some light source.


User avatar
rsfoto
Way More Fun to Share It!!
Posts: 6289
Joined: Mon Jun 18, 2012 8:30 pm
Location: San Luis Potosi, México
Has thanked: 9677 times
Been thanked: 5750 times

Re: SHG images Ha and Ca

Post by rsfoto »

thesmiths wrote: Sun Feb 12, 2023 7:17 pm I think you misunderstood how to focus the collimator. It is not the collimator that needs to be focused at infinity, it is the lens on the camera. I actually tend to focus on clouds (which are easily visible with a red filter). You then point the camera lens at the collimator lens and adjust the collimator until the image of the slit is in good focus. It doesn't matter really what the collimator is pointed at, just some light source.
Hi Doug,

No I did not misunderstand, I just wrote BS in the message before :lol: and realized it after I did click Send :lol:

I did it exactly as described in the video. I just looked at the video again and again and again ... Thanks

OK, clouds are nice and so you confirm that a 1.5 km far away chimney is not enough. How did then Christian manage it on trees out of his windows ... :lol: :lol: :lol:

OK, i will take down the whole poop again and check everything as described.

Rainer


regards Rainer

Observatorio Real de 14
San Luis Potosi Mexico

North 22° West 101°
thesmiths
Almost There...
Almost There...
Posts: 1066
Joined: Mon Jun 04, 2012 8:13 pm
Location: London, England
Has thanked: 47 times
Been thanked: 1521 times

Re: SHG images Ha and Ca

Post by thesmiths »

Actually, something 1.5km away is probably far enough. I don't think that's the most important issue.

My guess is the telescope focus is not quite right. As I said, that's the hardest one to get right.


User avatar
rsfoto
Way More Fun to Share It!!
Posts: 6289
Joined: Mon Jun 18, 2012 8:30 pm
Location: San Luis Potosi, México
Has thanked: 9677 times
Been thanked: 5750 times

Re: SHG images Ha and Ca

Post by rsfoto »

thesmiths wrote: Sun Feb 12, 2023 9:17 pm Actually, something 1.5km away is probably far enough. I don't think that's the most important issue.

My guess is the telescope focus is not quite right. As I said, that's the hardest one to get right.
Hi Doug,

My guess is the telescope focus is not quite right. As I said, that's the hardest one to get right.

OK. My workflow as of yesterday was

1. Find the desired wavelength be it Ha or CaK

2. Position the Sun on the FOV in the center and choose the widest side

3. Look at the lines of the spectrum and focus the them as good as possible with the camera focuser.

4. Look at both edges of the spectrum and focus the telescope so the edges are as sharp as possible. ¿ Is here my thinking wrong ?

5. Move the mount East so the Sun disappears.

6. Stop the mount

7. Start acquiring images at a rate of 11.4 fps and wait until the Sun disappears after it has crossed slowly at 1X the ROI of the camera and stop after I see nothing of light being recorded anymore. For this I use the histogram diagram.

Today 12/02/2023

Today I disassembled the whole shishkebab or enchilada in order to check the orientation and the seating of the collimator as well as objective lens and press them as firmly as possible into the tubes and the limiting rim inside the tube as well as the retaining rings. So far I think this is now OK.

Designed a special tripod holder for the objective tube plus camera as well as a red 1.25" filter with which I will focus the camera and then follow the instructions for collimating the collimator lens moving the collimator block as explained in the video.

Then I will again assemble everything, adjust new the grating and focuser motors and test it again. If the results are the same then I will ditch it in the Trash Can :mrgreen:


regards Rainer

Observatorio Real de 14
San Luis Potosi Mexico

North 22° West 101°
thesmiths
Almost There...
Almost There...
Posts: 1066
Joined: Mon Jun 04, 2012 8:13 pm
Location: London, England
Has thanked: 47 times
Been thanked: 1521 times

Re: SHG images Ha and Ca

Post by thesmiths »

In step 4 above: this is good for coarse focus of the telescope. But it is not sufficient to get "perfect" focus. See my recommendation previously above maximising the wiggle within the spectral line. You might need to make the line fairly bright to resolve the structure.

Are you not doing scanning faster than 1x sidereal rate? If you are, then your images are really good. Very slow scans will always have more noise.


User avatar
rsfoto
Way More Fun to Share It!!
Posts: 6289
Joined: Mon Jun 18, 2012 8:30 pm
Location: San Luis Potosi, México
Has thanked: 9677 times
Been thanked: 5750 times

Re: SHG images Ha and Ca

Post by rsfoto »

Are you not doing scanning faster than 1x sidereal rate?
Hi Doug,

OK, as soon as I have the enchilada assembled again I will look for the wiggle inside the Ha line.

Yes, I now stop the mount, let the Sun cross the SHG while acquiring my video and if more noise is then a problem then I am doomed. ¿ need to buy a new mount ? :lol:

This iOptron Poop does not well slewing at a rate of 16X or even 8X and this Poop cost me around US $ 6,998.00 in April 2018 and unfortunately I trusted iOptron and bought 2 pieces CEM 120EC2. During two years I detected 90% of the bugs in their firmware and when I found out some mechanical problems after that they just let me fall down like a hot potato so I have two big paperweights more or less ...

I should have listened to people with experience ... :evil:


regards Rainer

Observatorio Real de 14
San Luis Potosi Mexico

North 22° West 101°
thesmiths
Almost There...
Almost There...
Posts: 1066
Joined: Mon Jun 04, 2012 8:13 pm
Location: London, England
Has thanked: 47 times
Been thanked: 1521 times

Re: SHG images Ha and Ca

Post by thesmiths »

Did you already try to scan in DEC instead of RA? A lot of mounts will do better in DEC. You just have to rotate the Solex by 90 degrees.

If your mount really can't do a regular scan (which is indeed surprising) you could do the following trick. Make the mount rotate like it was in Australia, in the opposite direction. That is the equivalent of scanning at 2x sidereal rate.


User avatar
rsfoto
Way More Fun to Share It!!
Posts: 6289
Joined: Mon Jun 18, 2012 8:30 pm
Location: San Luis Potosi, México
Has thanked: 9677 times
Been thanked: 5750 times

Re: SHG images Ha and Ca

Post by rsfoto »

Hi,

I finished assembling the Sol?ex today after readjusting the collimator focus, etc. etc. and here 3 disks from today. Sun was already low at about 33° and from my experience with H-alpha etalons and Herschel wedge White light that is not good anymore. Need to find a hole between the Palm tree benaces at noon. In about a month the Sun passes free over the Palm tree branches. Also some high thin cirrus clouds.

I guess I am improving slowly slow slowly :mrgreen: They look a bit better then yesterday.

The images are as they came out from INTI with INTI contrast enhancement.


Image


Image


Image


regards Rainer

Observatorio Real de 14
San Luis Potosi Mexico

North 22° West 101°
User avatar
Montana
Librarian
Librarian
Posts: 34698
Joined: Mon Oct 17, 2011 5:25 pm
Location: Cheshire, UK
Has thanked: 17888 times
Been thanked: 8887 times

Re: SHG images Ha and Ca

Post by Montana »

It's round!!! well done Rainer :hamster: :hamster: :hamster: :)

Alexandra


User avatar
rsfoto
Way More Fun to Share It!!
Posts: 6289
Joined: Mon Jun 18, 2012 8:30 pm
Location: San Luis Potosi, México
Has thanked: 9677 times
Been thanked: 5750 times

Re: SHG images Ha and Ca

Post by rsfoto »

Montana wrote: Wed Feb 15, 2023 6:15 pm It's round!!! well done Rainer :hamster: :hamster: :hamster: :)

Alexandra
Hi Alexandra,

Yes it is round and noisy due to the fact that now I go ahead of the Sun into West, stop the mount and then let the Sun pass through the scope at a speed of 1x and take about 12 fps but his obviously is not good enough for getting less noise. My mounts do not have agood constant speed while slewing at 8X or 16X and I do not know why. Maybe because the Chinese do not know what a constant speed is even using encoders ?

Still need to fiddle out the best aperture size for the scope. At the moment it is a Astromania 60mm finder scope, this is a doublet and quite well corrected after looking at it at stars. Nice round stars all over the ASI 178MM chip at 240mm focal length.

Still a steep learning Hill to climb.

:(


regards Rainer

Observatorio Real de 14
San Luis Potosi Mexico

North 22° West 101°
User avatar
Alun_H
Almost There...
Almost There...
Posts: 535
Joined: Wed Apr 20, 2022 10:26 pm
Location: Berkshire UK
Has thanked: 648 times
Been thanked: 622 times

Re: SHG images Ha and Ca

Post by Alun_H »

Keep at it Rainer as you are so close,I think collimator focus is still the issue. I had the same problems getting good focus with the collimator on the slit on my Sol'Ex and I found the problem to be when tightening the bolts to lock the slit module onto the collimator tube,the box would twist very slightly when tightening that bolt on the side. Also found that there was a slight ridge running the length of the collimator tube which didn't help matters so using fine wet n dry I carefully flattened it and the tube sits in the Sol'Ex body and the slit box that much better. One other point is how tight a fit are the lenses in your collimator and camera lens tubes,mine were so tight I had to use force to push them in,I was in fear of actually breaking the lens. these should be a loose enough fit that they literally drop into the tube as demonstrated by Christian in his video,so once again out with the wet n dry sorted that issue.

Alun


Lunt 50THa solar scope
Lunt CaK B12 module
SW Evostar 72ED for full disk imaging
Sol'Ex SHG
80mm f/7 achromat used with pressure tune module off the Lunt with Lunt 100mm ERF
Bresser 90 f/10 achromat used for CaK & white light imaging & PST mod with Lunt 100mm ERF
Coronado SM40 (pre Meade) and BF10 filter set + SMII 60 richview DS etalon
Skywatcher EQ6 Pro and Ioptron CEM60
Then there is all the night kit which is far too long a list to write up here! :lol:
More images on view on my Flickr page...https://www.flickr.com/photos/alun_h/
User avatar
rsfoto
Way More Fun to Share It!!
Posts: 6289
Joined: Mon Jun 18, 2012 8:30 pm
Location: San Luis Potosi, México
Has thanked: 9677 times
Been thanked: 5750 times

Re: SHG images Ha and Ca

Post by rsfoto »

Alun_H wrote: Thu Feb 16, 2023 8:26 pm Keep at it Rainer as you are so close,I think collimator focus is still the issue. I had the same problems getting good focus with the collimator on the slit on my Sol'Ex and I found the problem to be when tightening the bolts to lock the slit module onto the collimator tube,the box would twist very slightly when tightening that bolt on the side. Also found that there was a slight ridge running the length of the collimator tube which didn't help matters so using fine wet n dry I carefully flattened it and the tube sits in the Sol'Ex body and the slit box that much better. One other point is how tight a fit are the lenses in your collimator and camera lens tubes,mine were so tight I had to use force to push them in,I was in fear of actually breaking the lens. these should be a loose enough fit that they literally drop into the tube as demonstrated by Christian in his video,so once again out with the wet n dry sorted that issue.

Alun
Hi Alun,

I checked several time the fit of the lenses and they are fall in fit without play.

About collimator focus I needed to loosen and tighten a few times the collimator block until it did not move anymore so I guess that is OK and while I did this the camera focus was not touched.

Just need more patience and a good Sun at midday ...

Thanks


regards Rainer

Observatorio Real de 14
San Luis Potosi Mexico

North 22° West 101°
thesmiths
Almost There...
Almost There...
Posts: 1066
Joined: Mon Jun 04, 2012 8:13 pm
Location: London, England
Has thanked: 47 times
Been thanked: 1521 times

Re: SHG images Ha and Ca

Post by thesmiths »

rsfoto wrote: Thu Feb 16, 2023 11:41 pm Just need more patience and a good Sun at midday.
Actually, the SHG technique is very sensitive to air turbulence since the exposures are effectively long. In your case, the exposure is VERY long since you are scanning at 1x sidereal rate. I would therefore try to image early in the day, close to sunrise. I found this improved images a lot.


User avatar
rsfoto
Way More Fun to Share It!!
Posts: 6289
Joined: Mon Jun 18, 2012 8:30 pm
Location: San Luis Potosi, México
Has thanked: 9677 times
Been thanked: 5750 times

Re: SHG images Ha and Ca

Post by rsfoto »

thesmiths wrote: Fri Feb 17, 2023 3:00 pm
rsfoto wrote: Thu Feb 16, 2023 11:41 pm Just need more patience and a good Sun at midday.
Actually, the SHG technique is very sensitive to air turbulence since the exposures are effectively long. In your case, the exposure is VERY long since you are scanning at 1x sidereal rate. I would therefore try to image early in the day, close to sunrise. I found this improved images a lot.
Hi Doug,

Nearly impossible as the Sun rises over the city and when I can catch the sun, the city is already warmed up = turbulence ... on the other side my love for this is not yet developed that big :shock: My best side is from Zenith to West, just a few buildings compared to the East, on the South the famous Palm trees and on the North there is no Sun :mrgreen:

This was a bad idea to spent the money and build a Sol'Ex ... :roll:


regards Rainer

Observatorio Real de 14
San Luis Potosi Mexico

North 22° West 101°
User avatar
PDB
Almost There...
Almost There...
Posts: 702
Joined: Mon Aug 15, 2016 4:23 pm
Location: Belgium
Has thanked: 2 times
Been thanked: 149 times

Re: SHG images Ha and Ca

Post by PDB »

Rainer,

3 things come to my mind which are worth checking:
- Are you sure you did not swap the collimator and imaging lens
- Or placed them with the correct surface facing out

What happened to me, and that gave bad images, was that I placed the collimator assembly where the camera should be and the camera where the collimator tube should go. (Easy to do that)

Paul


None of my posts or images may be shared on Facebook, Twitter or any other social media other than SolarChat without permission.
User avatar
rsfoto
Way More Fun to Share It!!
Posts: 6289
Joined: Mon Jun 18, 2012 8:30 pm
Location: San Luis Potosi, México
Has thanked: 9677 times
Been thanked: 5750 times

Re: SHG images Ha and Ca

Post by rsfoto »

PDB wrote: Fri Feb 17, 2023 4:44 pm Rainer,

3 things come to my mind which are worth checking:
- Are you sure you did not swap the collimator and imaging lens
- Or placed them with the correct surface facing out

What happened to me, and that gave bad images, was that I placed the collimator assembly where the camera should be and the camera where the collimator tube should go. (Easy to do that)

Paul

Hi Paul,

I am sure everything is assembled correctly.


regards Rainer

Observatorio Real de 14
San Luis Potosi Mexico

North 22° West 101°
vineyard
Im an EXPERT!
Im an EXPERT!
Posts: 448
Joined: Wed Feb 02, 2022 11:08 am
Has thanked: 714 times
Been thanked: 659 times

Re: SHG images Ha and Ca

Post by vineyard »

HI Rainer, I've been following your experiences with the SHG with interest. Any more positive steps, or is it still an exercise in frustration?

Fwiw, based on some of your comments in another thread, I've been in contact with a machining company here in the UK to see if they could machine the parts instead of 3D printing (in case that might make it a better, more robust & more accurate setup with less quirks)? Not all the features can apparently be CNC milled (esp the bits with square inside corners). Would there be any interest among forum members for a group order? (I have no connection to the milling company).

Cheers,

Vin


thesmiths
Almost There...
Almost There...
Posts: 1066
Joined: Mon Jun 04, 2012 8:13 pm
Location: London, England
Has thanked: 47 times
Been thanked: 1521 times

Re: SHG images Ha and Ca

Post by thesmiths »

vineyard wrote: Wed Feb 22, 2023 1:29 pm I've been in contact with a machining company here in the UK to see if they could machine the parts instead of 3D printing (in case that might make it a better, more robust & more accurate setup with less quirks)?
I would be worried about the weight. 3D printing with plastic may not be ideal but I'm quite sure aluminium would be too heavy. Carbon fibre would be an attractive alternative, at least for the base plane (both top and bottom). The sides could still be 3D printed plastic, along with the optics elements.


vineyard
Im an EXPERT!
Im an EXPERT!
Posts: 448
Joined: Wed Feb 02, 2022 11:08 am
Has thanked: 714 times
Been thanked: 659 times

Re: SHG images Ha and Ca

Post by vineyard »

thesmiths wrote: Wed Feb 22, 2023 2:14 pm
vineyard wrote: Wed Feb 22, 2023 1:29 pm I've been in contact with a machining company here in the UK to see if they could machine the parts instead of 3D printing (in case that might make it a better, more robust & more accurate setup with less quirks)?
I would be worried about the weight. 3D printing with plastic may not be ideal but I'm quite sure aluminium would be too heavy. Carbon fibre would be an attractive alternative, at least for the base plane (both top and bottom). The sides could still be 3D printed plastic, along with the optics elements.
Ah I hadn't thought of that (never having seen one in real life I didn't realise it might be sensitive to weight - would it not be fine if the mount it was on was robust enough)? I suspect carbon fibre would be v specialist and much more expensive?


User avatar
rsfoto
Way More Fun to Share It!!
Posts: 6289
Joined: Mon Jun 18, 2012 8:30 pm
Location: San Luis Potosi, México
Has thanked: 9677 times
Been thanked: 5750 times

Re: SHG images Ha and Ca

Post by rsfoto »

Hi Vin,
Any more positive steps, or is it still an exercise in frustration?
A lot of mixed feelings.
Fwiw, based on some of your comments in another thread, I've been in contact with a machining company here in the UK to see if they could machine the parts instead of 3D printing (in case that might make it a better, more robust & more accurate setup with less quirks)? Not all the features can apparently be CNC milled (esp the bits with square inside corners). Would there be any interest among forum members for a group order? (I have no connection to the milling company).
I understand and those were my first feeling too but after adding some springs and some additional stiffener parts it is quite good, I even would say very good. My spectrum from beginning to end is quite well centered.

By pure coincidence I just made some tests moving the Sol'Ex into different positions where I have the Sun from December to June and did see that the movement is totally acceptable as well as moving the mount from East to west.

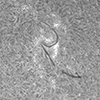
Just as an example on February 20th I made some spectra and then on February 21st again and after getting the Sun into the slit I saw that the differences were so tiny in regard to H-alpha absorption line from one day to the other as well as focus was nearly spot on.

Perhaps a thicker walls and a few better designed stiffening parts would make it better but from what I have seen the optics placement and the grating wheel and turning it is very exact.

An absolutely must is to motorize the Camera Focus, Telescope focus and grating rotation. Adjusting this 3 parameters by hand I dare to say is gambling with 25% or even less success ...

What could also be better designed is the collimation adjustment. That part is quite finicky. Perhaps the collimator tube should have a left and right thread and so we could move the slit towards the lens in a much finer way. The tube movement inside the hole and the tightening of it at the moment is not well thought over.

Unfortunately the measurements are not available and so designing new and better parts is a real PITA as reverse engineering from already printed parts is possible but with a lot of guesses in regard to exact sizes.

I am searching for instructions how to calculate a SHG and perhaps I take the time and design new parts for the existing optics. :?

Just an idea of a retiree with too much free time ...

BTW, PETG is a good material. I have made many parts and tested them in regard to strength and they are very strong and UV resistance is also very good. I made some parts and they are hanging in the Sun a few months already and they are in good shape. Even the colour has no yet faded.

Just thinking aloud with my keyboard about this.

One important thing for 3D printing is where to position and how to choose the seams as well as defining a good strong infill and how to print the walls, for example if from inside to outside or outside to inside. One should do a lot of test with a test piece and compare them. Nothing in 3D printing is Plug&Play ...


regards Rainer

Observatorio Real de 14
San Luis Potosi Mexico

North 22° West 101°
thesmiths
Almost There...
Almost There...
Posts: 1066
Joined: Mon Jun 04, 2012 8:13 pm
Location: London, England
Has thanked: 47 times
Been thanked: 1521 times

Re: SHG images Ha and Ca

Post by thesmiths »

vineyard wrote: Wed Feb 22, 2023 4:33 pm
thesmiths wrote: Wed Feb 22, 2023 2:14 pm
vineyard wrote: Wed Feb 22, 2023 1:29 pm I've been in contact with a machining company here in the UK to see if they could machine the parts instead of 3D printing (in case that might make it a better, more robust & more accurate setup with less quirks)?
I would be worried about the weight. 3D printing with plastic may not be ideal but I'm quite sure aluminium would be too heavy. Carbon fibre would be an attractive alternative, at least for the base plane (both top and bottom). The sides could still be 3D printed plastic, along with the optics elements.
Ah I hadn't thought of that (never having seen one in real life I didn't realise it might be sensitive to weight - would it not be fine if the mount it was on was robust enough)? I suspect carbon fibre would be v specialist and much more expensive?
The problem is not the weight on the mount but the fact that the Solex design is supported by the telescope focuser.


vineyard
Im an EXPERT!
Im an EXPERT!
Posts: 448
Joined: Wed Feb 02, 2022 11:08 am
Has thanked: 714 times
Been thanked: 659 times

Re: SHG images Ha and Ca

Post by vineyard »

Ah I see re the focuser and the weight - that makes sense, thanks @thesmiths

And glad to see that you're feeling more positive about the SHG Rainer - those seem like good ideas for improvements. Maybe the SHG designers would be open for collaboration for improvements rather than you having to reinvent or reverse engineer too much?

And that's reassuring re the PETG - I'll stand the milling company down, and continue following your progress!


User avatar
rsfoto
Way More Fun to Share It!!
Posts: 6289
Joined: Mon Jun 18, 2012 8:30 pm
Location: San Luis Potosi, México
Has thanked: 9677 times
Been thanked: 5750 times

Re: SHG images Ha and Ca

Post by rsfoto »

The problem is not the weight on the mount but the fact that the Solex design is supported by the telescope focuser.
Hi Doug,

I completely agree with and I saw this a few weeks ago and added some stabilisators in order to avoid a sagging of the Sol'Ex especially after the weight more then doubled from the original design adding 3 motors.

So what I did frst was to take two square cardon fiber rods and make a base on which the telescope and the Sol'Ex would rest as well as na adjuster for the Sol'Ex to keep it On Axis with the telescope center.

SolEx_Side_view_3_rail.jpg
SolEx_Side_view_3_rail.jpg (199.5 KiB) Viewed 927 times

After that watching the Sol'Ex dance from side to side I added some springs for pulling down the Sol'Ex onto the adjuster wedge.

SOLEX_Stabi_1.jpg
SOLEX_Stabi_1.jpg (1.08 MiB) Viewed 927 times
SOLEX_Stabi_2.jpg
SOLEX_Stabi_2.jpg (942.44 KiB) Viewed 927 times
SOLEX_Stabi_3.jpg
SOLEX_Stabi_3.jpg (1.07 MiB) Viewed 927 times
SOLEX_Stabi_4.jpg
SOLEX_Stabi_4.jpg (1007.04 KiB) Viewed 927 times

After that I saw how weak the connection of the collimator block to my scope was. My scope has a focuser tube with an 8mm M42 thread which fits into the collimator block. I did not trust that M42x075 thread and therefore I added a block pressing onto the collimator block and pressing the focuser tube. Looks a bit of overkill but I guess it does its job in stabilizing the M42 collimator thread and the M42 focuser tube connection.

SOLEX_Stabi_5.jpg
SOLEX_Stabi_5.jpg (1.03 MiB) Viewed 927 times
SOLEX_Stabi_6.jpg
SOLEX_Stabi_6.jpg (1005.22 KiB) Viewed 927 times

One could go on and on but so far this are the first weak points I have seen and I guess this helps for stabilizing the whole enchilada ...


regards Rainer

Observatorio Real de 14
San Luis Potosi Mexico

North 22° West 101°
User avatar
rsfoto
Way More Fun to Share It!!
Posts: 6289
Joined: Mon Jun 18, 2012 8:30 pm
Location: San Luis Potosi, México
Has thanked: 9677 times
Been thanked: 5750 times

Re: SHG images Ha and Ca

Post by rsfoto »

Hi,

This is now how the whole SHG looks like on the mount.

SOLEX_Stabi_7.jpg
SOLEX_Stabi_7.jpg (1.02 MiB) Viewed 924 times

... and seeing how cumbersome the adjustment of the collimator block was I added a second stiffener for the block which helped pushing the collimator block better in and out as it was more straight in the hole.

SOLEX_Stabi_8.jpg
SOLEX_Stabi_8.jpg (1.2 MiB) Viewed 924 times


regards Rainer

Observatorio Real de 14
San Luis Potosi Mexico

North 22° West 101°
thesmiths
Almost There...
Almost There...
Posts: 1066
Joined: Mon Jun 04, 2012 8:13 pm
Location: London, England
Has thanked: 47 times
Been thanked: 1521 times

Re: SHG images Ha and Ca

Post by thesmiths »

This is a bit off topic, but does the little fan really reduce the temperature of the camera sensor? I didn't look to me that the sensor has much thermal contact to the back of camera.


User avatar
rsfoto
Way More Fun to Share It!!
Posts: 6289
Joined: Mon Jun 18, 2012 8:30 pm
Location: San Luis Potosi, México
Has thanked: 9677 times
Been thanked: 5750 times

Re: SHG images Ha and Ca

Post by rsfoto »

thesmiths wrote: Thu Feb 23, 2023 3:28 am This is a bit off topic, but does the little fan really reduce the temperature of the camera sensor? I didn't look to me that the sensor has much thermal contact to the back of camera.
Hi,

Yes it does reduce it about 5°C and the question here is not the contact but the whole housing gets warmer and warmer and keeping the housing cooler keeps the sensor cooler and if it does not, then at least it looks cooler then the plain naked camera :lol:


regards Rainer

Observatorio Real de 14
San Luis Potosi Mexico

North 22° West 101°
Post Reply